

Post by Smangii on Jul 18, 2006 22:48:27 GMT -5
Nice and easy way to multi-color ^^ Figured this out a few days ago, lol...
This should work with PSP 7 and Up.
Step 1: Open your image that you want to multi-color. You can even open an old image, and re-color it. I'm going to use this signature:
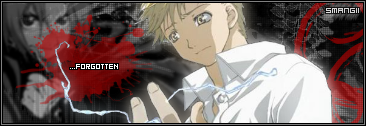
And I'm going to de-saturate it by going to Adjust --> Hue & Saturation --> Hue/Saturation/Lightness --> And bring the saturation bar down to 0. Leave all the others at 0 as well. My image now looks like this:

Step 2: Go to the Picture Tube Tool or click "I" on your keyboard. Select the picture tubes either: Retro Starburts, Modern Circles, or Retro-Squares. I'm going to use Retro Starbursts for this one.
Step 3: Create a new layer, go to layers --> new raster layer --> Ok
Step 3: Randomly click around your image. Try to vary the sizes, and locations. Don't bunch them up in one spot. Here's what I did:

Step 4: After you're done, go the Layers Palette. Double Click on Raster 2 (not the background one) and set the Blend mode to Color. (NOT color legacy). Reduce the opacity to 50 for light colors, 60 for average, and 70 for bright colors. Click OK.
Step 5: With your 2nd layer still highlighted in the layers palette, go to Adjust --> Blur --> Motion Blur. These are your settings:
Angle: 238
Strength: 100
Click OK.
Step 6: Walla! You've got an easy multi-colored image! Here's what my final product was:

Optional STep 7: If you want to change the colors, go to Adjust --> Hue and Saturation --> Hue/Saturation/Lightness and mess around with the Hue bar. You can also adjust the other bars for lighting.
I hope you enjoyed this easy way to multi-color! ;D
(c) Smangii 2006 for SIGFX
This should work with PSP 7 and Up.
Step 1: Open your image that you want to multi-color. You can even open an old image, and re-color it. I'm going to use this signature:
And I'm going to de-saturate it by going to Adjust --> Hue & Saturation --> Hue/Saturation/Lightness --> And bring the saturation bar down to 0. Leave all the others at 0 as well. My image now looks like this:
Step 2: Go to the Picture Tube Tool or click "I" on your keyboard. Select the picture tubes either: Retro Starburts, Modern Circles, or Retro-Squares. I'm going to use Retro Starbursts for this one.
Step 3: Create a new layer, go to layers --> new raster layer --> Ok
Step 3: Randomly click around your image. Try to vary the sizes, and locations. Don't bunch them up in one spot. Here's what I did:
Step 4: After you're done, go the Layers Palette. Double Click on Raster 2 (not the background one) and set the Blend mode to Color. (NOT color legacy). Reduce the opacity to 50 for light colors, 60 for average, and 70 for bright colors. Click OK.
Step 5: With your 2nd layer still highlighted in the layers palette, go to Adjust --> Blur --> Motion Blur. These are your settings:
Angle: 238
Strength: 100
Click OK.
Step 6: Walla! You've got an easy multi-colored image! Here's what my final product was:
Optional STep 7: If you want to change the colors, go to Adjust --> Hue and Saturation --> Hue/Saturation/Lightness and mess around with the Hue bar. You can also adjust the other bars for lighting.
I hope you enjoyed this easy way to multi-color! ;D
(c) Smangii 2006 for SIGFX


